


Torna

Alert me if this item is restocked.
We often restock popular items or they may be returned by the other customers. If you would like to be notified when this happens just enter your details below.
Entrance Files Pro Gold (Glide Path File)
We respect your privacy and don't share your email with anybody.
Alert me if this item is restocked
Entrance Files Pro Gold (Glide Path File)
Entrance Files Pro Gold (Glide Path File)
Couldn't load pickup availability
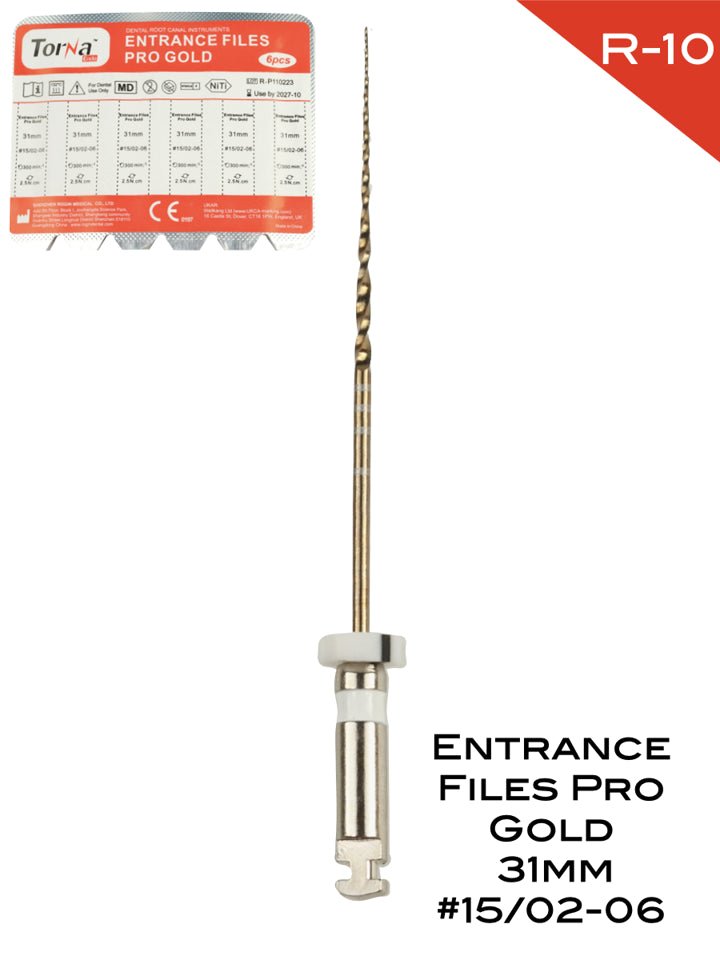
Heat-treated Entrance Files Pro Gold glide path files, supplied sterile in packs of six. Size #15 with 2–6% variable taper.
File Details
Each pack contains 6 of the following, sterile files:
-
Entrance Files Pro Gold - #15/2-6%
All files are heat treated and offer excellent flexibility and cyclic fatigue resistance.
The files are packed in foil blister packs.
Each file is individually labelled with useful details like the recommended operating speed and torque.
Because the files are individually labelled, files can be separated without losing important information.
See materials for further information regarding this file system.
Incidental File System Guide
1) Okay, so you’ve found your canals. The first step is to have a little scout down the canal with a pre-curved stainless steel K file (size 8 or 10 normally). The goal at this point is to try to get patency of the canal, but don’t rush to the end. If the file meets any resistance, just stop and back out. Then gently open the first few mm of the canal with the orifice opener. This will stop the scouting files from binding and reduce stress on the file seeking patency.
If your K files are really struggling to negotiate the canals then consider trying one of our ‘C Plus (C+)’ files. These files are designed to manage calcified and blocked canals. The tip and metal are more rigid, reducing deformation and increasing ability to navigate challenging clinical situations.
2) After the orifice is open, keep working the hand files down until you record patency (zero point on the apex locator). Pro tip - with some experience, you can even carefully use the Entrance file gold and Entrance file Pro to help achieve patency as the metals are such high quality.
3) Once you have achieved patency, record your working length (0.5mm short of the zero point on the apex locator). Take your Entrance file pro down to this working length. The Entrance Pro File file is designed to preferentially cut at the top of the file and this reduces stress at the lower portions of the file. This taper produces an easy transition to your final shaping file, reducing the risk of file fracture and other procedural errors.
If the Entrance File Pro #15 (VT) is struggling to reach working length, then try introducing the #13/02 Entrance File or sequentially open up where you can reach to with larger files to reduce binding.
4) Once you have the #15 VT Entrance File Pro File at working length, you are ready to shape your master file.
#20/04 is for narrow canals. #25/04 is for most canals. It is specifically aimed at dentists who like a continuous motion file and want to prepare files with a conservative taper. R25 Recip-One Blue is also for most canals. It is for dentists who prefer a reciprocating file and are happy to trade a slightly wider preparation for easier irrigation and obturation. These files are also excellent for re-treatment cases.
P.S. The #15 VT Entrance File Pro was specifically designed to match the diameter of the R25 and 25/04 files so that there is reduced coronal binding during master file shaping.
5) With your master file to length, you then need to select your GP point.
Dia-pro Iso Plus Gutta Percha .04 taper in sizes #20 or #25 will match our #20/04 and #25/04 respectively.
Reciproc Blue Gutta-Percha R25 points are the perfect match for the R25 Recip-One Blue file.
*Please note that GP points can be gauged using a gutta percha cutter or similar and this is usually appropriate if the GP is binding past the desired working length.
6) Finally, don’t forget about drying the canals. There is nothing better than a match paper point so check out the Reciproc Blue Paper Points R25 and Dia-Pro Iso Plus Paper Points .04 taper to make life super easy.
Options & Product References
Materials
Materials



UK Delivery Within 5 Working Days
Your orders are shipped with Fedex and usually arrive much quicker. We prefer to under promise and overdeliver however! Orders over £100 ship for free.

Unrivalled Value
We are market disrupters: no reps, no trade shows, no course sponsorship, no freebies. All this means consistently better prices for our customers.

Online Customer Service
We offer super responsive online support that we are really proud of. Emailing us is the most efficient way for us to help you

Curated Range
No need to spend valuable time scrolling through page after page of iterations of the same product. We've done the work hard for you; we would'nt use it, we wont sell it!

EU Delivery 2 - 11 Days
Orders from the EU will be delivered, duty paid, via FEDEX. No taxes or duties to pay once your order arrives!
Alert me if this item is restocked.
We often restock popular items or they may be returned by the other customers. If you would like to be notified when this happens just enter your details below.
Entrance Files Pro Gold (Glide Path File)
We respect your privacy and don't share your email with anybody.
Alert me if this item is restocked
Thank you, we have now received and recorded your request to be notified should Entrance Files Pro Gold (Glide Path File) be restocked.
We will only use your email for this purpose.